The Best Fluffy Pancakes recipe you will fall in love with. Full of tips and tricks to help you make the best pancakes.


Have you ever bitten into a piece of chicken that felt like you were chewing on a rubber band? We have all been there! For a long time, I thought chicken breasts were just meant to be dry and boring. But then, I discovered the magic of the air fryer, and my kitchen life changed forever. Now, I get to enjoy chicken that is beautifully golden-brown on the outside and incredibly juicy on the inside every single time.
This recipe is my absolute favorite because it is so simple but tastes like it came from a fancy restaurant. It has a savory, smoky flavor thanks to a special blend of spices, and the texture is just perfect. Whether you are a kitchen pro or just starting out, this air fryer method is a total game-changer. It is faster than an oven and much easier to clean up!
In this post, I am going to share my secret tips for making sure your chicken never dries out. We will talk about the best seasonings to use and exactly how long to cook it so it stays tender. Get ready to meet your new favorite weeknight dinner that the whole family will love!
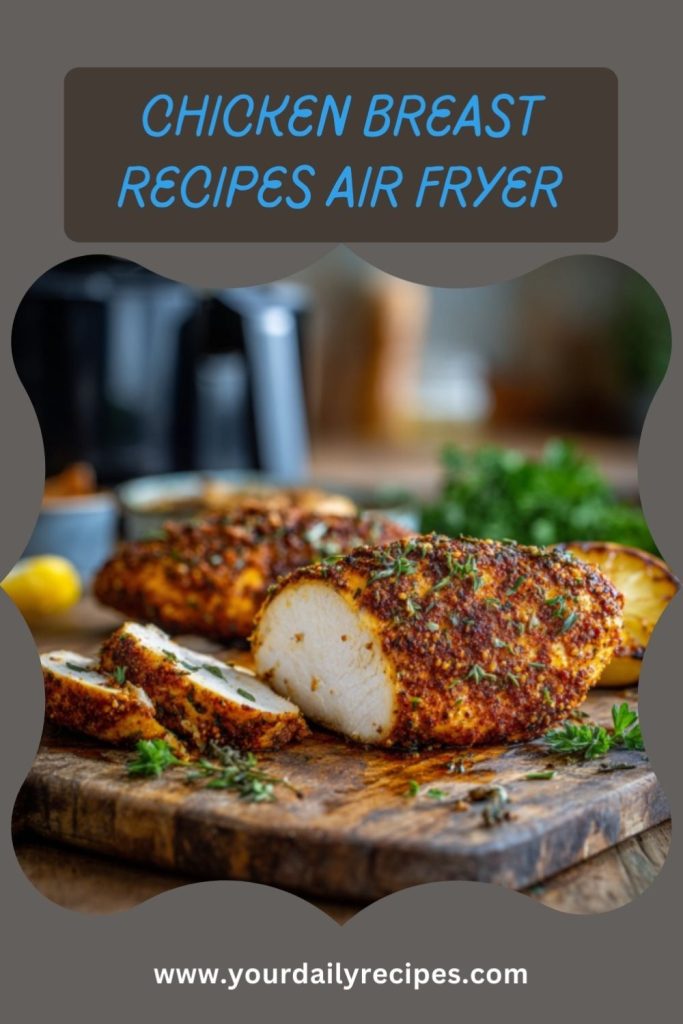
General Information
| Particulars | Details |
|---|---|
| Preparation Time | 5 min. |
| Cook Time | 15 min. |
| Total Time | 20 min. |
| Yields | 2-4 servings |
| Difficulty | Easy |
| Total Calories | 185 kcal (Per Serving) |
| Cuisine | American |
Why You’ll Love This Recipe
If you are looking for a recipe that checks all the boxes, this is it! Here is why this air fryer chicken is going to become a staple in your home:
- Incredibly Juicy: The air fryer locks in all the moisture, so you get a tender center with perfectly crispy edges.
- Super Fast: You can have a healthy main dish on the table in under 20 minutes, making it perfect for busy school nights.
- Healthier Choice: You only need a tiny bit of oil to get that “fried” texture, which makes it a light and nutritious option.
- Simple Ingredients: This recipe uses basic pantry staples like garlic powder and paprika that you probably already have.
- Great for Meal Prep: These chicken breasts stay delicious even the next day, making them perfect for salads, wraps, or grain bowls.
Here’s What You Will Need
The magic of this recipe is in the simple pantry staples that come together to create a flavor explosion. By rubbing the chicken with a little oil and a mix of spices, we create a “crust” that keeps all the juices locked inside while the air fryer works its magic.
- Chicken Breasts – Look for pieces that are roughly the same size so they cook evenly. If one side is much thicker than the other, I recommend gently pounding it with a heavy pan so it’s level.
- Olive Oil – This helps the spices stick to the chicken and ensures the outside gets a beautiful golden color. You can also use avocado oil or even melted butter!
- Smoked Paprika – This gives the chicken a gorgeous reddish tint and a hint of wood-fired flavor without any heat.
- Garlic and Onion Powder – These are the “dynamic duo” of seasoning. They add a deep, savory taste that makes the chicken smell amazing while it cooks.
- Dried Oregano or Italian Seasoning – This adds a touch of earthy, herbal goodness. (Substitute: Dried thyme or parsley also work great!)
- Salt and Black Pepper – These are essential to wake up all the other flavors. I prefer using kosher salt for a better crust.
How to Make This Dish: Step-by-Step Guide
This is the fun part! Making chicken in the air fryer is so easy that you will want to do it every single night. Just follow these simple steps for the best results.
- Preheat Your Air Fryer: First things first, turn on your air fryer and set it to 380°F (193°C). Let it warm up for about 3-5 minutes. This is a big secret! A hot basket helps the chicken start cooking right away so the outside gets a nice color.
- Dry and Season: While the air fryer warms up, take a paper towel and pat the chicken breasts dry. This helps the oil and spices stick better. In a small bowl, mix your spices. Rub the olive oil all over the chicken, then sprinkle the spice mix on both sides. Use your fingers to press the spices in so they don’t fall off!
- Arrange in the Basket: Place the chicken in the preheated air fryer basket. Make sure they are not touching or overlapping. They need “breathing room” so the hot air can swirl all around them.
- Cook to Juicy Perfection: Slide the basket in and cook for 12-15 minutes. When the timer hits 7 minutes, open the basket and use tongs to flip the chicken over. This makes sure both sides are equally yummy and golden!
- The Final Check: Your chicken is done when it is golden brown on the outside. The best way to know for sure is to use a meat thermometer. It should read 165°F (74°C) in the thickest part.
- Let it Rest: Carefully remove the chicken and put it on a plate. Wait for 5 minutes before you cut it! If you cut it too soon, all the yummy juices will run out. Resting keeps it tender.
Variations to Try
One of the best things about this recipe is how easy it is to change the flavor! Here are 3 of my favorite ways to mix things up:
- Lemon Herb Style: Instead of paprika, use dried thyme and lemon zest. Once it’s done cooking, squeeze a little fresh lemon juice over the top for a bright, fresh taste.
- Cheesy Garlic (Keto Friendly): Mix 2 tablespoons of grated Parmesan cheese into your spice rub. It creates a salty, crispy “crust” that is absolutely delicious!
- Spicy Buffalo: If you like heat, leave out the oregano and add 1/4 teaspoon of cayenne pepper to the rub. After cooking, toss the chicken in your favorite Buffalo wing sauce.
- BBQ Glaze: Follow the recipe as written, but in the last 2 minutes of cooking, brush a little BBQ sauce on top of the chicken. It will get sticky and caramelized!
How to Store, Reheat, and Freeze
If you have leftovers, don’t worry! This chicken stays delicious if you store it the right way.
Storage
- In the Fridge: Place your cooked chicken in an airtight container once it has cooled down. It will stay fresh and tasty for 3 to 4 days.
- In the Freezer: You can freeze these chicken breasts for up to 3 months. I like to wrap them tightly in plastic wrap and then put them in a freezer-safe bag. This helps prevent “freezer burn.”
Reheating
- The Best Way: Put the chicken back in the air fryer at 350°F (177°C) for about 3-5 minutes. This makes the outside crispy again without drying out the middle.
- What to Avoid: Try not to use the microwave for a long time. It can make the chicken feel a bit like rubber. If you must use a microwave, use a low power setting and add a tiny splash of water to the plate.
What To Serve With This Dish
This chicken is like a “blank canvas”—it goes with almost anything! Here are my favorite pairings:
- Roasted Veggies: While the chicken rests, I love throwing some broccoli or asparagus into the air fryer. The flavors match perfectly!
- A Fresh Garden Salad: Slice the warm chicken and lay it over a bed of cool greens with a light vinaigrette. It’s a healthy and filling lunch.
- Creamy Mashed Potatoes: For a cozy “comfort food” dinner, serve the chicken next to fluffy potatoes and maybe a little bit of gravy.
- Fluffy Rice or Quinoa: If you want something simple, a scoop of white rice or quinoa helps soak up any extra juices.
Helpful Pro Tips and Tricks
I’ve made this recipe hundreds of times, and these are the secrets I’ve learned along the way:
- Use a Meat Thermometer: This is the #1 rule! Every air fryer is a little different. Checking for that 165°F (74°C) mark is the only way to guarantee it’s safe to eat but still juicy.
- Don’t Overcrowd: If you pack too many pieces in the basket, they will steam instead of “fry.” Keep space between them so the air can dance around!
- Even Thickness: If your chicken breast has one very thick end, give it a little “massage” with a meat mallet (or a heavy pan) to flatten it out. This ensures the whole piece finishes cooking at the same time.
- The Oil Matters: Use an oil with a “high smoke point” like olive or avocado oil. Avoid using aerosol sprays directly on the basket, as they can sometimes damage the coating over time.
Frequently Asked Questions

Can I cook frozen chicken breasts in the air fryer?
Yes, you can! You don’t even have to thaw them first. However, you will need to add about 5-8 extra minutes to the cooking time. Just make sure to check the internal temperature carefully with a thermometer.
Why did my chicken come out dry?
This usually happens if the chicken is cooked for too long or if the temperature was too high. Next time, try taking it out as soon as it hits 165°F (74°C) and remember to let it rest for 5 minutes before cutting it!
Do I really need to flip the chicken?
While air fryers circulate air well, flipping the chicken halfway through ensures that the “crust” and color are perfectly even on both sides. It only takes a second and makes a big difference!
Final Words
I really hope you give this air fryer chicken recipe a try! It has honestly saved me so much time on those nights when I’m tired but still want a healthy, home-cooked meal. There is something so satisfying about hearing that “crunch” when you slice into a perfectly seasoned piece of chicken, knowing it’s going to be tender and delicious.
Cooking doesn’t have to be complicated to be amazing. With just a few spices and your trusty air fryer, you can make a protein-packed dinner that tastes like a treat. I can’t wait to hear how yours turns out! Happy cooking, and enjoy every single juicy bite!
PrintThe Ultimate Juicy Air Fryer Chicken Breast
- Prep Time: 5
- Cook Time: 15
- Total Time: 20
- Yield: 2–4 servings 1x
- Category: Main Course
- Method: Air Fryer
- Cuisine: American
Ingredients
Scale
- 2 large Boneless, Skinless Chicken Breasts (about 1 lb / 450g)
- 1 tbsp Extra-Virgin Olive Oil (15ml)
- 1 tsp Smoked Paprika
- 1 tsp Garlic Powder
- 1/2 tsp Onion Powder
- 1/2 tsp Dried Oregano
- 1/2 tsp Kosher Salt
- 1/4 tsp Black Pepper
- Optional: A pinch of Cayenne pepper (if you like a little kick!)
Instructions
- Preheat: Set air fryer to 380°F (193°C).
- Season: Pat chicken dry, coat with oil, and rub with spices.
- Cook: Air fry for 12-15 minutes, flipping halfway through.
- Check: Ensure it reaches 165°F (74°C).
- Rest: Let it sit for 5 minutes before serving.
Nutrition
- Serving Size: 2-4
- Calories: 185 kcal
- Sodium: 350mg
- Fat: 7g
- Saturated Fat: 1.2g
- Carbohydrates: 1g
- Protein: 26g