The Best Fluffy Pancakes recipe you will fall in love with. Full of tips and tricks to help you make the best pancakes.


I think we can all agree that there’s something special about a perfectly crispy piece of chicken. That satisfying crunch followed by a tender, juicy bite is pure comfort food. But for a long time, I thought the only way to get that perfect texture was through deep-frying, which meant a lot of oil, a bit of a mess, and a heavier meal than I wanted on a regular weeknight. Then, the air fryer changed everything.
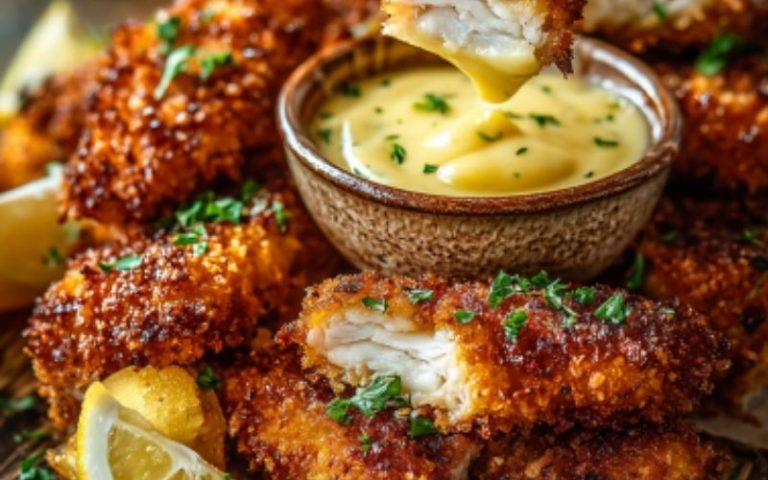
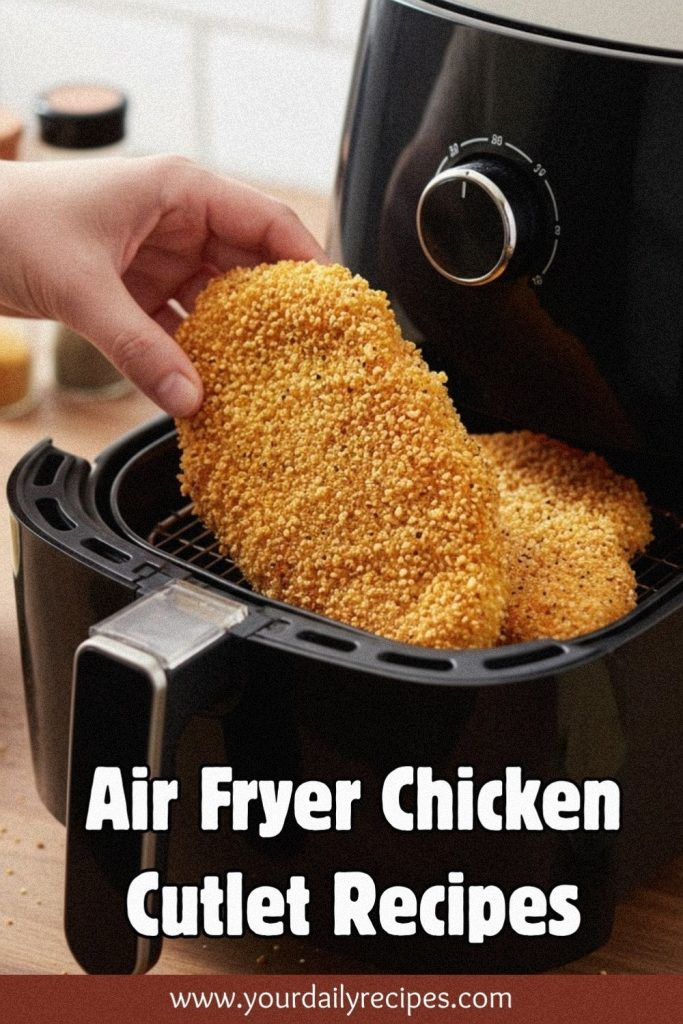
These Air Fryer Chicken Cutlets are a total game-changer. They come out of the basket with a stunning golden-brown crust that’s incredibly crunchy and a flavor-packed seasoning that makes every bite delicious. The chicken inside stays wonderfully moist and tender, creating a perfect contrast. It’s the kind of simple, satisfying meal that makes you feel like a kitchen superstar without any of the fuss.
This recipe is my go-to for a reason: it’s quick, it’s healthier, and it delivers that fried chicken experience we all crave. In this post, I’ll walk you through every simple step, from prepping the chicken to getting the seasoning just right, so you can make flawless chicken cutlets every single time.
General Information
| Particulars | Details |
|---|---|
| Preparation Time | 10 min. |
| Cook Time | 12 min. |
| Total Time | 22 min. |
| Yields | 4 cutlets |
| Difficulty | Easy |
| Total Calories | 305 kcal (Per Serving) |
| Cuisine | American |
Why You’ll Love This Recipe
Get ready to add a new favorite to your weekly dinner rotation! This recipe is designed to be as easy as it is delicious, and here are a few reasons why you’re going to fall in love with it:
- Incredibly Crispy, Never Greasy: The air fryer works its magic, circulating hot air to give the panko coating a deep-fried crunch using just a tiny spritz of oil.
- Ready in Under 20 Minutes: This is the perfect meal for busy weeknights. From prep to plate, you can have these delicious cutlets ready in no time.
- A Healthier Way to Indulge: Enjoy all the flavor and texture of traditional fried chicken cutlets with significantly less fat and calories. It’s a win-win!
- Made with Simple Pantry Staples: No fancy ingredients here! You likely have everything you need in your kitchen already to whip these up tonight.
- Endlessly Versatile: These cutlets are amazing on their own, but they’re also perfect for making chicken Parmesan, slicing over a salad, or tucking into a sandwich.
Here’s What You Will Need
The magic of this recipe is how it transforms a few simple, everyday ingredients into something truly special. There’s no need for a complicated shopping list—just a handful of kitchen basics.
- Chicken Breast Cutlets – These are the star of the show. Using thin-sliced cutlets ensures they cook quickly and evenly. If you have regular chicken breasts, you can easily slice them in half horizontally or pound them thin yourself.
- All-Purpose Flour & Eggs – This classic duo is the foundation of our breading station. The flour gives the egg wash something to cling to, and the egg acts as the perfect glue for our crispy breadcrumb coating.
- Panko Breadcrumbs – This is the secret to getting that light, airy, and ultra-crispy texture that makes these cutlets so irresistible. In a pinch, regular breadcrumbs will work, but panko provides a superior crunch.
- The Seasoning Blend – A simple mix of garlic powder, onion powder, paprika, salt, and pepper infuses the coating with a savory, well-rounded flavor that complements the chicken perfectly.
- Cooking Oil Spray – Just a light spritz on the cutlets is all you need. This helps the panko toast up to a beautiful golden brown and maximizes the crunch factor. I like using an avocado or olive oil spray.
How to Make This Dish: Step-by-Step Guide
Now for the fun part! Making these cutlets is so simple with this easy assembly-line method. You’ll have perfectly coated, crispy chicken in just a few steps.
- Set Up Your Breading Station: Grab three shallow dishes (pie plates or wide bowls work great). In the first dish, place the all-purpose flour. In the second dish, whisk the two eggs until they are well beaten. In the third dish, combine the panko breadcrumbs, garlic powder, onion powder, paprika, salt, and pepper. Mix them together until the seasonings are evenly distributed.
- Prep and Bread the Chicken: Before you start, make sure to pat your chicken cutlets completely dry with a paper towel. This is a crucial secret for getting the coating to stick perfectly! Working one cutlet at a time, first dredge it in the flour, making sure to coat both sides, then gently shake off any excess. Next, dip it into the beaten egg, letting any extra egg drip back into the dish. Finally, press the cutlet firmly into the panko mixture, ensuring it’s completely covered on both sides. Set the breaded cutlet on a clean plate and repeat with the remaining chicken.
- Preheat Your Air Fryer: While you bread the last cutlet, preheat your air fryer to 375°F (190°C). This usually takes about 3-5 minutes and helps the chicken start cooking the moment it goes in, leading to a crispier result.
- Time to Air Fry: Lightly spray the inside of your preheated air fryer basket with cooking oil spray to prevent sticking. Carefully place the breaded chicken cutlets in a single layer in the basket. It’s important not to overcrowd the basket, so cook in batches if you need to. Lightly spray the tops of the cutlets with a little more oil spray—this is what helps them get that beautiful golden-brown color.
- Cook to Crispy Perfection: Air fry for 10-12 minutes, flipping the cutlets over halfway through the cooking time. They are done when the outside is beautifully golden brown and crispy, and the chicken is cooked through. The safest way to check is with a meat thermometer; it should read 165°F (74°C).
- Serve and Enjoy: Carefully remove the hot chicken cutlets from the air fryer. Let them rest for just a minute before serving them hot with your favorite sides.
How to Store, Reheat and Freeze
One of the best things about this recipe is that the cutlets are almost as good leftover as they are fresh, as long as you reheat them properly!
Storage:
- Refrigerator: Once the cutlets have cooled completely, you can store them in an airtight container in the refrigerator for up to 3-4 days. To help them stay as crispy as possible, you can place a paper towel at the bottom of the container to absorb any moisture.
- Freezer: These chicken cutlets freeze beautifully! Let them cool completely, then place them on a baking sheet in a single layer and “flash freeze” for about an hour until solid. Transfer the frozen cutlets to a freezer-safe zip-top bag or airtight container. They will keep well in the freezer for up to 3 months.
Reheating:
- The Best Way (Air Fryer): The air fryer is your best friend for bringing back that original crunch! Preheat it to 350°F (175°C) and place the leftover cutlets in the basket. Heat for 3-5 minutes (or a bit longer if from frozen) until they are warmed through and crispy again.
- Oven Method: You can also reheat them in the oven. Place the cutlets on a wire rack set over a baking sheet and pop them into a preheated 400°F (200°C) oven for about 5-8 minutes.
- What to Avoid: I highly recommend avoiding the microwave for reheating. It will turn that wonderfully crispy breading soft and soggy, and nobody wants that!
Variations to Try
While this classic recipe is a total winner on its own, it’s also a wonderful canvas for other flavors! Here are a few simple variations you can try to mix things up.
- Spicy Chicken Cutlets: For those who like a little heat, add 1/4 to 1/2 teaspoon of cayenne pepper to your panko breadcrumb mixture. For another layer of spice, you can even add a few dashes of your favorite hot sauce to the egg wash before dipping the chicken.
- Italian Herb & Parmesan Cutlets: This is my favorite version for making chicken parm! Simply add 1 tablespoon of grated Parmesan cheese and 1 teaspoon of dried Italian seasoning to the panko mixture. The flavor is incredible and smells amazing as it cooks.
- Gluten-Free Chicken Cutlets: Making this recipe gluten-free is a breeze. Just substitute the all-purpose flour with a gluten-free 1-to-1 baking flour and use gluten-free panko breadcrumbs. The cooking method and time remain exactly the same!
- Lemon Pepper Cutlets: For a bright and zesty twist, add the zest of one fresh lemon and an extra 1/2 teaspoon of coarsely ground black pepper to the panko. This version is especially delicious served with a salad or roasted asparagus.
What To Serve With This Dish
These air fryer chicken cutlets are so versatile, they can be the star of almost any meal. Here are some of my favorite ways to serve them:
- Classic Comfort Dinner: Pair the hot, crispy cutlets with a side of creamy mashed potatoes, a simple steamed vegetable like green beans or broccoli, and a lemon wedge for squeezing over the top.
- The Ultimate Chicken Sandwich: Place a cutlet on a toasted brioche or ciabatta bun. Top with crisp lettuce, juicy tomato slices, and a generous smear of mayonnaise or garlic aioli for a sandwich that rivals any restaurant.
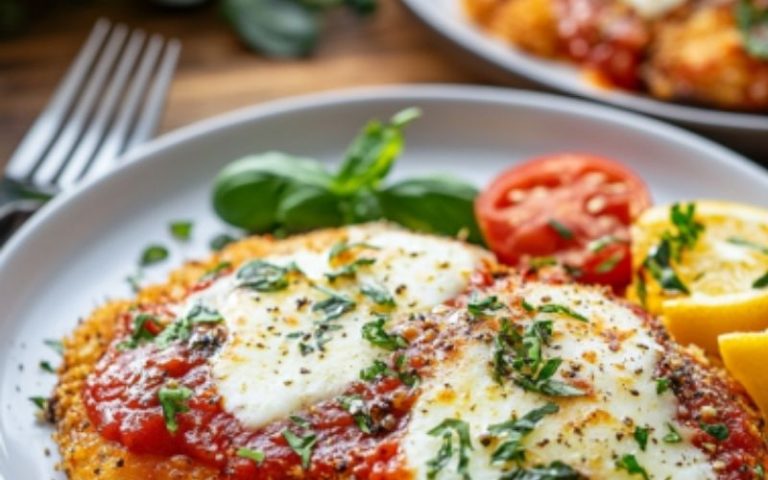
- A Quick & Easy “Chicken Parm”: Serve the cutlets over a bed of your favorite pasta tossed in marinara sauce. For an extra treat, top the chicken with a slice of mozzarella cheese and pop it back in the air fryer for 1-2 minutes, just until the cheese is melted and bubbly.
- A Lighter Meal: Slice the cutlets and serve them warm over a fresh Caesar salad or a simple mixed greens salad with your favorite vinaigrette for a satisfying and healthy lunch or dinner.
Helpful Pro Tips and Tricks
After making these cutlets countless times, I’ve picked up a few little tricks that guarantee they turn out perfectly every single time.
- Don’t Skip Patting the Chicken Dry: I can’t stress this enough! Starting with dry chicken is the number one secret to getting the breading to adhere perfectly. Any moisture will create steam and make the coating slide off.
- Even Thickness is Key: If your cutlets have thick and thin spots, they’ll cook unevenly. Take an extra minute to pound the thicker parts of the chicken to an even 1/2-inch (or 1 cm) thickness. This guarantees juicy chicken from edge to edge.
- Press the Breading Firmly: When you dip the chicken in the panko, use your hand to gently but firmly press the crumbs onto the surface. This helps create a compact, durable crust that won’t fall off in the air fryer.
- Give Them Space in the Basket: The magic of the air fryer is how the hot air circulates around the food. If you overcrowd the basket, the chicken will steam instead of getting crispy. Always cook in a single layer, even if it means working in two batches. I promise it’s worth it!
- Use a Thermometer for Perfect Results: The best way to get juicy, perfectly cooked chicken without any guesswork is to use an instant-read meat thermometer. Once the thickest part of the cutlet reaches an internal temperature of 165°F (74°C), it’s done!
Frequently Asked Questions

Here are the answers to a few common questions I get about making these delicious air fryer chicken cutlets.
Can I make these ahead of time?
Yes, absolutely! To save time, you can bread the chicken cutlets up to 4 hours in advance. Just lay them in a single layer on a parchment-lined baking sheet, cover them, and keep them in the refrigerator. When you’re ready to eat, they can go straight from the fridge into the preheated air fryer.
Why did my breading fall off?
This is a common issue, but it’s easy to fix! The breading might fall off if the chicken wasn’t patted completely dry before starting, which prevents the flour from sticking. Another reason could be skipping one of the three breading steps (flour, then egg, then breadcrumbs). Finally, make sure to gently press the panko into the chicken to help it adhere and be careful when flipping the cutlets in the air fryer.
Can I use chicken thighs instead of breasts?
Of course! Boneless, skinless chicken thighs are a fantastic and flavorful alternative. They are naturally juicier than breasts, so they work very well in the air fryer. Just make sure to pound them to an even thickness and check the internal temperature, as they might need an extra minute or two of cooking time to reach 165°F (74°C).
Last Bites
And there you have it—a simple, foolproof way to get incredibly crispy, juicy, and flavorful chicken cutlets right from your air fryer. This recipe is proof that you don’t need a lot of time or a vat of oil to create a meal that feels special and satisfying. It’s the kind of dish that brings smiles to the dinner table and makes weeknight cooking feel like less of a chore and more of a joy.
I truly hope you and your family love these air fryer chicken cutlets as much as we do. They have become a staple in my kitchen for their ease and deliciousness, and I’m so excited for them to become a favorite in yours, too. Happy cooking!
PrintAir Fryer Chicken Cutlets
- Prep Time: 10
- Cook Time: 12
- Total Time: 22
- Yield: 4 cutlets 1x
- Category: Main Course
- Method: Air Fryer
- Cuisine: American
Ingredients
Scale
- 2 large Chicken Breasts (about 1 lb / 450g), sliced into 4 thin cutlets (about 1/2-inch or 1 cm thick)
- 1/2 cup All-Purpose Flour (60g)
- 2 large Eggs
- 1 cup Panko Breadcrumbs (70g)
- 1 tsp Garlic Powder
- 1 tsp Onion Powder
- 1/2 tsp Paprika
- 1/2 tsp Kosher Salt
- 1/4 tsp Black Pepper
- Cooking Oil Spray
Instructions
- Preheat: Preheat the air fryer to 375°F (190°C).
- Prep Station: Set up three shallow dishes: one with flour, one with beaten eggs, and one with the panko breadcrumbs mixed with all seasonings.
- Bread Chicken: Pat the chicken dry. Coat each cutlet in flour, then dip in egg, and finally press into the panko mixture until fully coated.
- Cook: Place the cutlets in a single layer in the air fryer basket. Lightly spray the tops with oil. Cook for 10-12 minutes, flipping halfway through.
- Serve: Remove when the cutlets are golden brown, crispy, and have an internal temperature of 165°F (74°C). Serve immediately.
Nutrition
- Serving Size: 2
- Calories: 305 kcal
- Sodium: 485mg
- Fat: 7g
- Carbohydrates: 22g
- Fiber: 1g
- Protein: 36g